Difference between revisions of "Filmetrics Profilm3D"
Jump to navigation
Jump to search
(Updated URL) |
(update to NEMO) |
||
| Line 7: | Line 7: | ||
| imagecaption = | | imagecaption = | ||
| Instrument_Type = Metrology | | Instrument_Type = Metrology | ||
| − | | Staff_Manager = David Barth | + | | Staff_Manager = [[David Barth | David Barth]] |
| Lab_Location = Cleanroom Corridor | | Lab_Location = Cleanroom Corridor | ||
| Tool_Manufacturer = Filmetrics | | Tool_Manufacturer = Filmetrics | ||
| Tool_Model = Profilm3D | | Tool_Model = Profilm3D | ||
| − | | | + | | NEMO_Designation = MET-05 |
| Lab_Phone = XXXXX | | Lab_Phone = XXXXX | ||
| SOP Link = [https://repository.upenn.edu/server/api/core/bitstreams/c3892eaf-4315-4adf-bbd4-803c69ccd4dc/content SOP] | | SOP Link = [https://repository.upenn.edu/server/api/core/bitstreams/c3892eaf-4315-4adf-bbd4-803c69ccd4dc/content SOP] | ||
Latest revision as of 14:18, 3 January 2024
 |
|
| Tool Name | Filmetrics Profilm3D Optical Profilometer |
|---|---|
| Instrument Type | Metrology |
| Staff Manager | David Barth |
| Lab Location | Cleanroom Corridor |
| Tool Manufacturer | Filmetrics |
| Tool Model | Profilm3D |
| NEMO Designation | MET-05 |
| Lab Phone | XXXXX |
| SOP Link | SOP |
Description
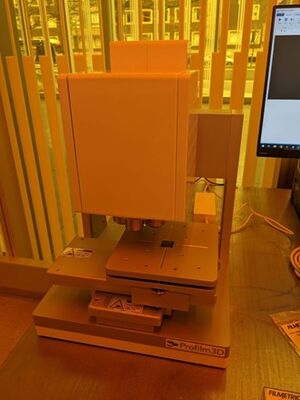
The Profilm3D is an optical profilometer capable of white light interferometry (WLI), green light interferometry (GLI), and phase shift interferometry (PSI). It can measure surface topography, roughness, and step heights from 1 nm up to 10 mm. The tool has two Mirau interferometry objectives: a 10x objective with a field of view ~2x2mm for high speed and large area measurements and a 50x objective for spatial resolution up to 0.176 μm.
Applications
- Step height measurements
- Surface roughness measurements
- 3D mapping of surfaces