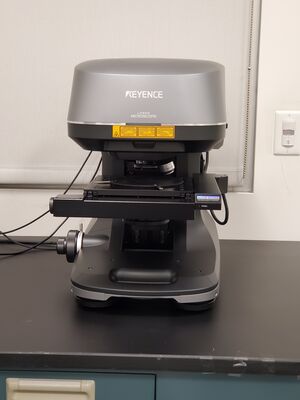
Keyence Profilometer
 |
|
| Tool Name | Keyence |
|---|---|
| Instrument Type | Profilometer |
| Staff Manager | Nicole Bohn, Matt Brukman, Jamie Ford |
| Lab Location | Singh 018 |
| Tool Manufacturer | Keyence |
| Tool Model | Keyence VK-X3100 |
| NEMO Designation | Keyence Profilometer |
| Nearest Phone | XXXXX |
| SOP Link | Keyence Operating Guide |
Description
The Keyence VK-X3100 combines laser scanning confocal microscopy with white light/focus variation modes to measure 3D characteristics of surfaces, including roughness, planar dimensions, height, film thickness, and more. The tool includes objective lenses from 5X to 50X, allowing both low and high magnification work on a variety of surfaces.
This tool is an ideal alternative to SEM when capturing large fields of view or measuring features due to its ability to scan and stitch large areas and its suite of 3D measurement tools. A copy of the data analysis program is available in the NCF computer room in 023.
To obtain good measurements, it is crucial that data is properly filtered before measuring. Some basic information on filtering and measurement modes are provided in the manuals, but these are not exhaustive documents.
Manuals
The Keyence comes with a collection of manuals to orient users to the basic operations and procedures for various data collection and analysis modes:
Collecting Data
Gathering New Data Using Laser Confocal
Detects height information using reflected laser intensity and the objective focus. May have reduced data quality and angular resolution at low magnifications.
Gathering New Data Using Focus Variation/White Light Interferometer
Currently no Interferometry available. Focus Variation captures multiple optical images at different focal lengths and uses the change in contrast to determine shape information.
Gathering New Film Thickness Data
Techniques for measuring film thickness, including permeable films and glass, as well as transparent coatings. Uses either laser confocal or spectral interference.
Analysis Techniques
Process Image
Basic processing and filtering procedures to be done before analysis.
Average Step Height Measurement (Flatness)
A tool to determine height difference, maximum height, minimum height, and flatness.
Comparative Measurement
A tool for direct comparison of 2 profile lines from different samples.
Plane Measurement
A tool to measure various lengths, angles, diameters, etc.
Profile Measurement
The function to measure the height, distance (length,) cross-sectional area, angle, R (arc,) etc. of a profile graph of any profile line (straight or curved.)
Surface Roughness Measurement
Line, multiline, and surface roughness measurement according to ISO standards.
Volume and Area Measurement
A tool to measure convex or concave volume, cross sectional area, and surface area.
Repeated Measurement Techniques
Batch Analysis/Recommendation
A useful technique for conducting measurements across several similar samples. Recommendation can be used to differentiate surfaces based on their surface texture.
Teaching Module
Evaluate multiple measurement positions by changing the lens, measurement method, or measurement conditions. May be used as an inspection mode with a template file containing nominal values and tolerances.